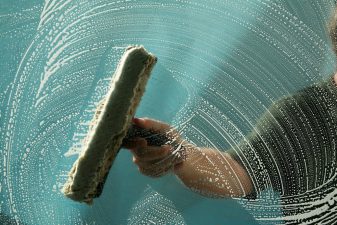
In case you’ve ever methodically cleaned windows for your residence, top to bottom & left to right, you’ve surely encountered the immense pleasure when you’ve spotted so much more sunlight striking into your home. You will notice that your home is instantly transformed into a brighter and more positive space right away when you have super polished and clean windows.
But getting back to the reality states that no one really loves cleaning windows do they? Well, you don’t have to like it while doing it, but trust me on it that you’ll love the outcome of precisely clean windows. Take this job as many of your other weekend household tasks like doing laundry or DIY plumbing and you’ll feel the instant achievement when you’ll have your windows cleaned. By you.
Just a handy tip, Springtime would be the perfect season to get the job done if you haven’t get your hands dirty cleaning windows in a while. Before you clean windows, be practical here about which windows you can clean yourself. Remember, you don’t need to play a hero and end up your next 2 months in the bed having your bones fractured.
In this article, we’re going to draw your attention to a few simple but essential techniques to get smear free windows at home. Doesn’t matter if it’s a stubborn spot or a greasy stain, these techniques will solve your problem.
So, without further due, let’s get into it and get ready to be amazed while using it yourself.
It’s required to pay attention to these simple things before you start cleaning your windows and make it shine like the brightest day on earth.
1. Cleaning Stubborn Smear, Awkward Stains:
Outdoor windows are specifically vulnerable to stubborn stains as they are unprotected to heavy rain, hard waters,
Outside windows are especially liable to stubborn stains as they are uncovered to rainwater runoff, minerals, bird do-dos, and other stuff that can splatter on dirt and leave muddy spots. There are few tricks that can come handy while removing smear spots on inside-outside windows.
Get yourself a mineral deposit removing cleaner, Dip a sponge in it and rub at the stain spots gently on the windows. Splash the area using water first and go with the regular cleaning.
You can also use pure vinegar by spraying it on the affected portion and leave it to get soaked for least 8-10 minutes. A sponge or a soft cloth can be your real friend in this situation.
You can work with oxalic acid if you make a paste with water. Put some of it in your cleaner and the rest in your the affected portion and give a good rub. Splash away the paste when the stain gets thin and soft.
Got a grainy stain on your windows which you can’t wipe off rubbing? Have no fear. Use a razor to rake them off. Be careful though as you wouldn’t want any grumpy razor scratch on your window.
2. Remove Unnecessary Stickers:
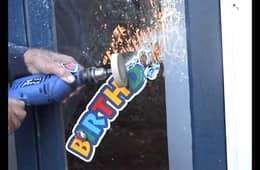 You might have kids in your home who did fancy decorating your windows with cute stickers or bird repellant owl decals. You probably couldn’t figure back then how difficult would that be to remove the adhesive substances from the windows in future.
However, don’t worry as we’ve got you covered. Get yourself a plastic scrubber with the sharp edge, a spray bottle full of water and you are good to roll.
Let the stickers soak the water for a few moments.
Put firm pressure while holding the scrubber against the windows making a 60-degree angle. Go up and down from upside down of the sticker while scraping your way off directional.
Wipe off the excess water with a towel when you think you’re happy with the result.
3. Wash the Screen after Removing it
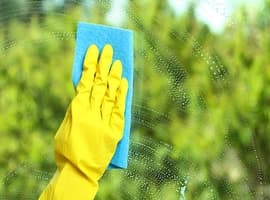 You’ll have to clean your windows screen everytime you clean your windows almost twice a year. It’s applicable for both inside and outside windows. Don’t forget to vacuum the unworthy dust and dirt after removing the screens.
You can use a water sprayer and gently spray the screen before and after you’re done wiping it.
Have yourself warm water and mix it with a splash of vinegar. Dish soap will work fine as well. Use a clean cloth or sponge dipping into that mixture and wipe the screen with it. Let the screens air dry before you replace them.
4. Mop off the Dirt and Mud from Outside Windows
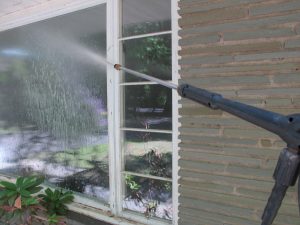
Outside windows are subjects to catch all sorts of smut, dirt, and other polluting materials. You’ll need to use a garden hose to cleanse off the smudges from the panes in case you have really dirty windows.
A lint-free cloth and water can really come in handy to rinse away the dirt if you don’t have the flexibility to use a hosepipe.
5. Did you Forget to Vacuum inside Windows?
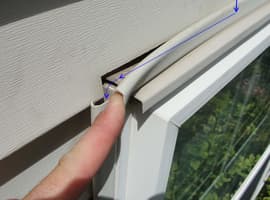 Make sure you vacuum all parts of corner areas on the windows. start cleaning inside windows, Put a large towel in front of the window to catch spills to avoid unwanted hackle. You can’t just let the dirt spreading everywhere while cleaning. When you do it, you’ll have to make sure that you’re doing it right.
6. Choose your Supplies and Tool Smartly:
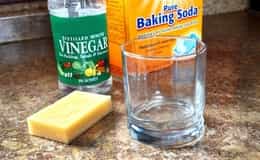 You must gather these few things if you want to perform a primary but effective job to clean windows:
Squeegee or scrubber or sponge
A bucket full of water or water sprayer bottle
Rubber wiper or towel for drying
Save inside floor using large carpets or towel
7. Make your Windows smile by Cleaning Solution
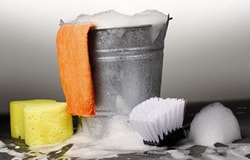 Although there is a huge variety of cleaners available in the market to clean windows, while according to most experts, a primary water and dish soap mixed solution can do the job more than good. A paper towel or newspaper is good enough to just move mud. You make this mixture to make your windows look cleaner.
6 liters of water with one teaspoon of dishwashable liquid.
Equal parts water and white vinegar if you’re making the mixture in a bottle.
15 grams of cornstarch streaks prevention plus 70 ml of rubbing alcohol and vinegar and 500 ml of water.
8. Clean windows Smart & Quickly
 The windows which have multiple panes are likely to be treated by a sponge where a scrubber can be useful for large picture windows. Soak your sponge into the bucket full of mixture. Twist off the excess water, rinse down the whole window and be sure to reach all the corners.
You’ll have to use an extension pole with scrubber attached on it to clean the high outside windows.
Do not move on to the next one before the previous window you cleaned is dry. If the scraper whimpers a lot while washing or drying the windows, use a little soap with the water.
9. Wipe off the Extra Water
To prevent streaks on windows and get clean windows, look out for dripped or spilled water or water running down the windows wipe the area dry with a spongy cloth, lint-free fabric.
You can use a different piece of rag or fabric to wipe off the water from the window sill. This will prevent damage to the frame.
10. Make the Windows Dry to Add Extra Shine
 Make your way from top to bottom through the windows with small panes by using a rubber blade on the scraper and rinse away the water vertically. Horizontal stroke is a smart choice for pictured windows. Cross over your previous stroke by a few inches every time you dry the blade with a lint-free piece of cloth for each stroke.
Prevent your windows from getting streaks by purchasing a good quality scraper with a sharp-edged rubber blade in it. Make yourself always ready with a streak-free window cleaning solution. Rubber blades are subject to replace as it gets blunt after using multiple times. Once it’s dull, it will start leaving streaks. While rubbing the window gently with a rubber blade make sure that it is always touching the window.
After you’re done washing the windows, you’ll be amazed by seeing how much extra sunlight is brightening your home interior. Think about the feel, just go for it thinking as it’s one of your weekend DIY projects. Mark my words. You will not regret it.
Happy cleaning!


